Transactions
The transactions section contains information about all your push and pull payments in one place.
Use Cases
- Customer Inquiry Resolution: Locate a transaction using identifiers, review response codes, and reference the transaction timeline to answer questions about transaction statuses, declines, duplicate, or refunds.
- Dispute Investigation: Use the Chargebacks tab to analyze dispute reason codes, identify potential fraud patterns, and review linked transactions to determine root cause or next steps.
How to Find the Transactions Page
Log in to the TabaPay Portal and select Transactions.
The Transaction Page appears.
Real-Time Feed Versus Enhanced Transactions Feed
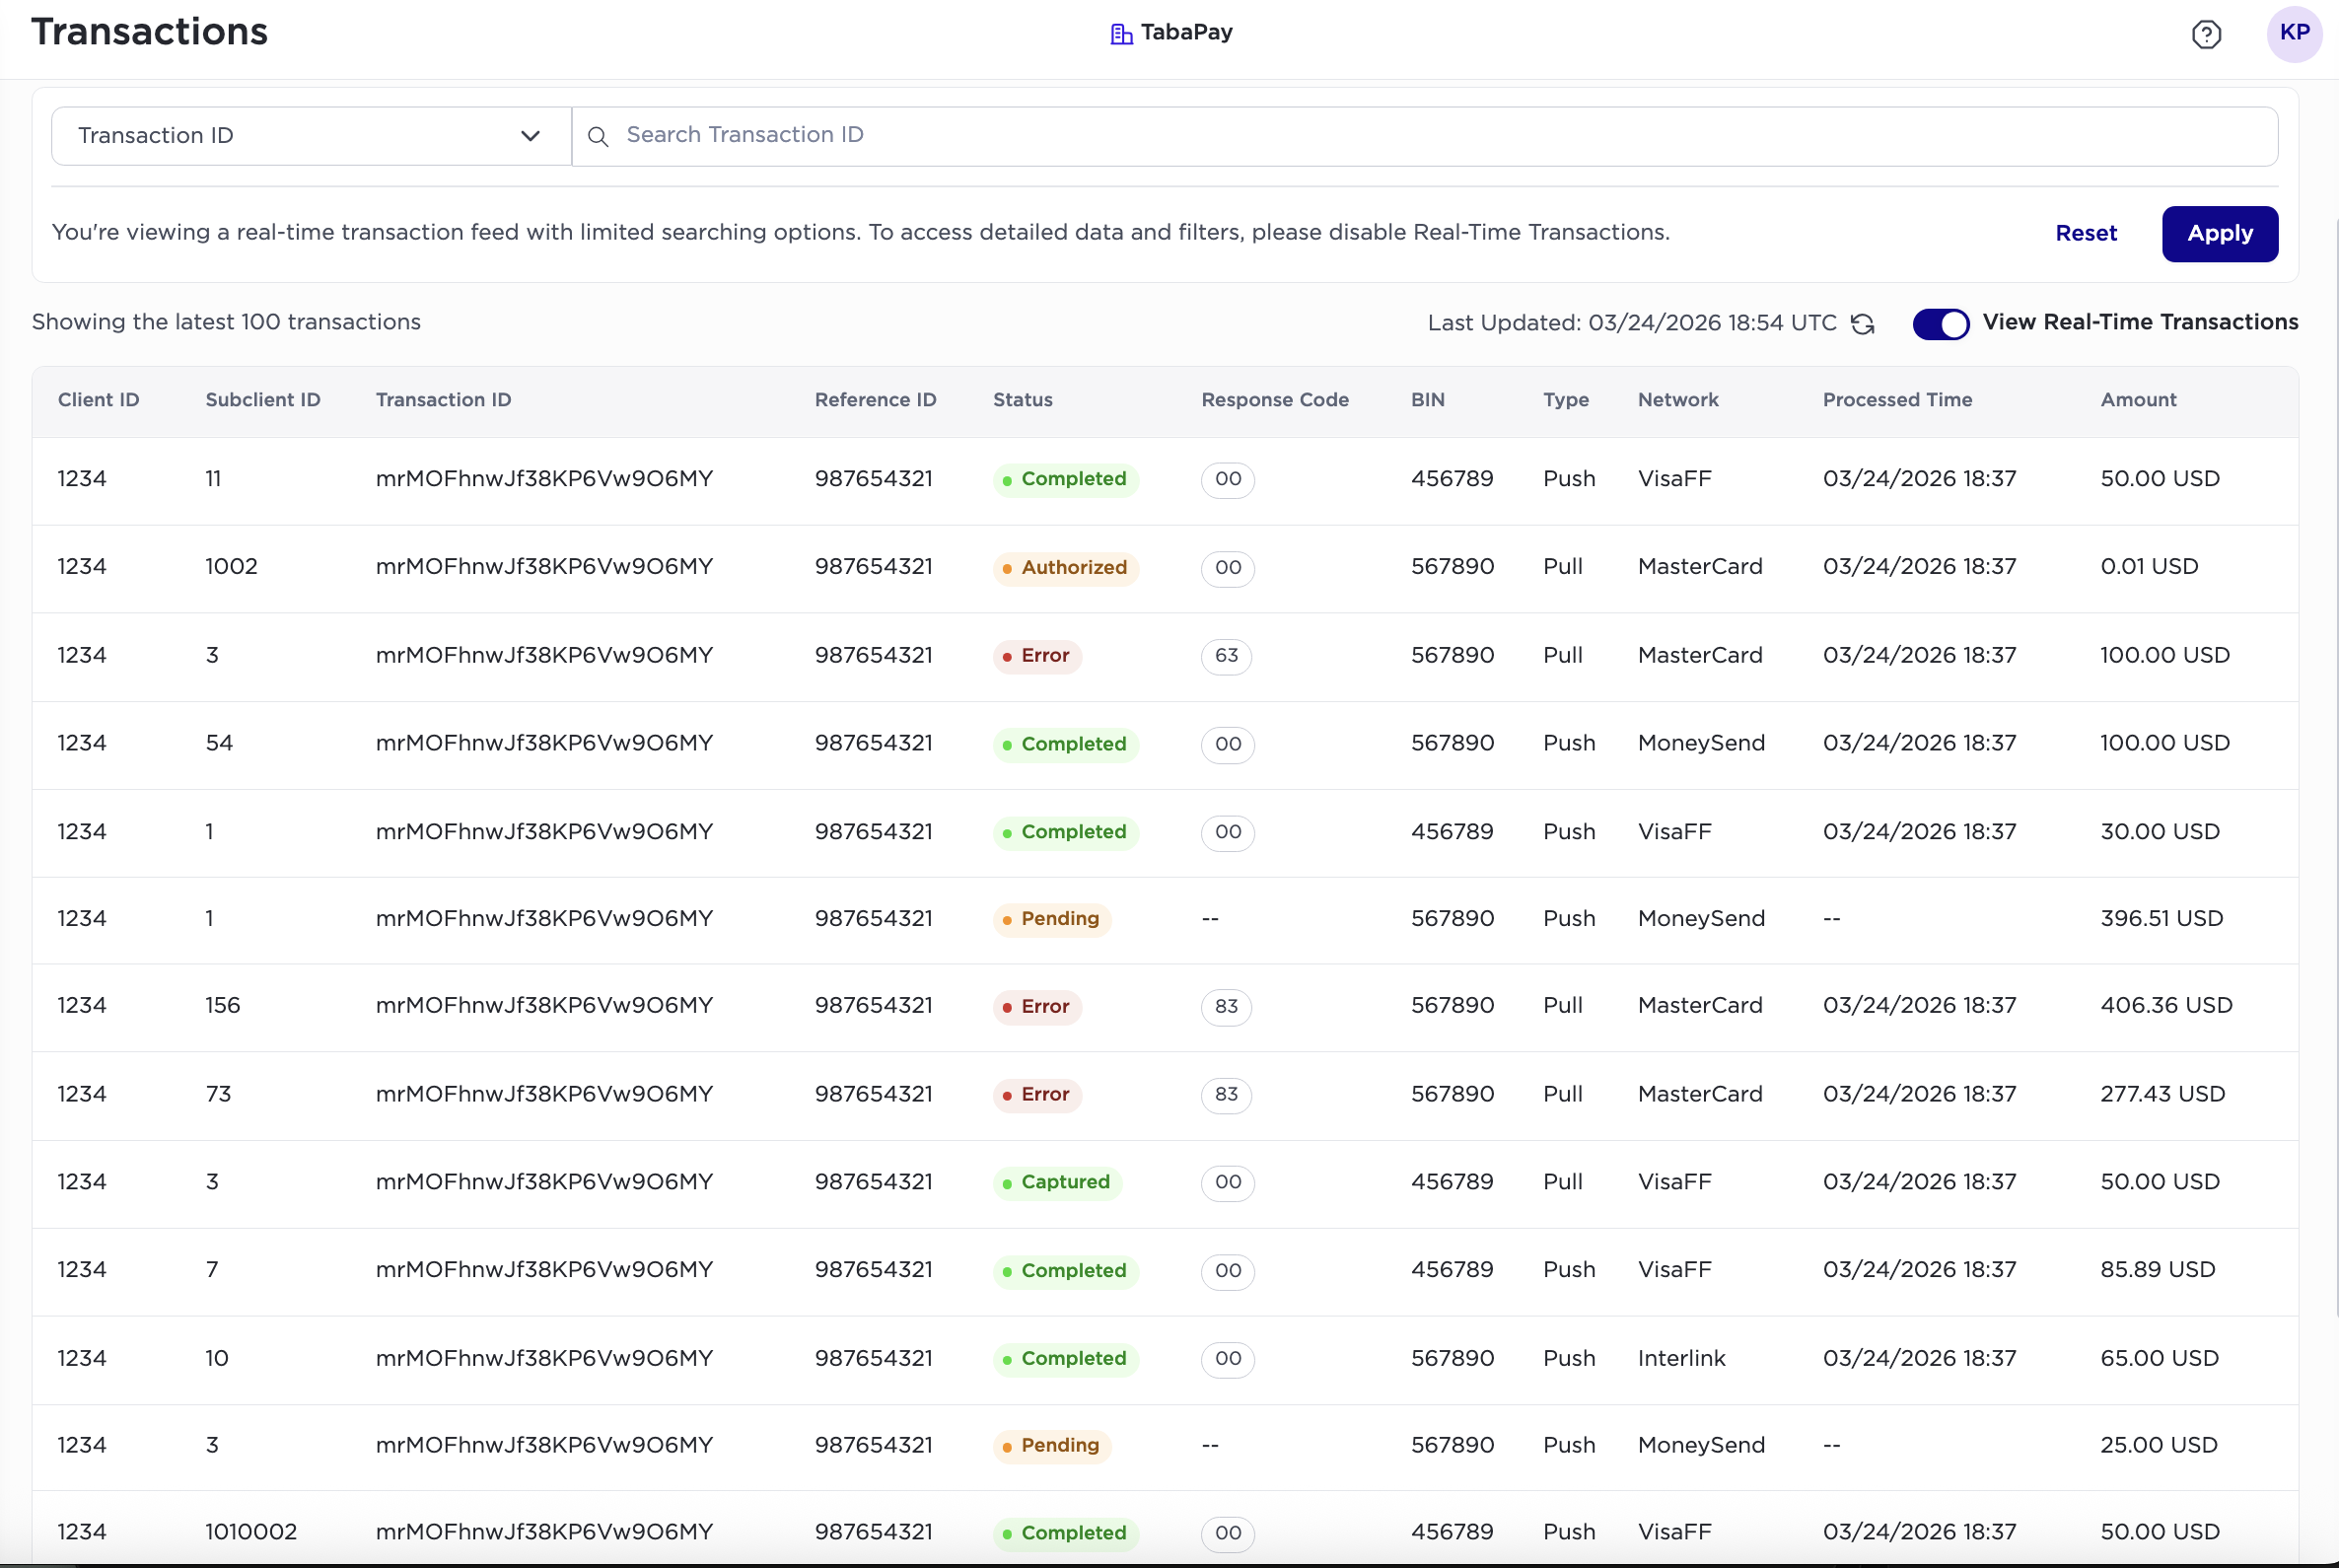
The real-time feed only provides a limited set of transaction data. If you want to view the full set of transaction data, turn off the View Real-Time Transactions toggle on the transaction table and click on the individual transactions.
By default, the Real-Time Transaction Feed displays all transaction records.
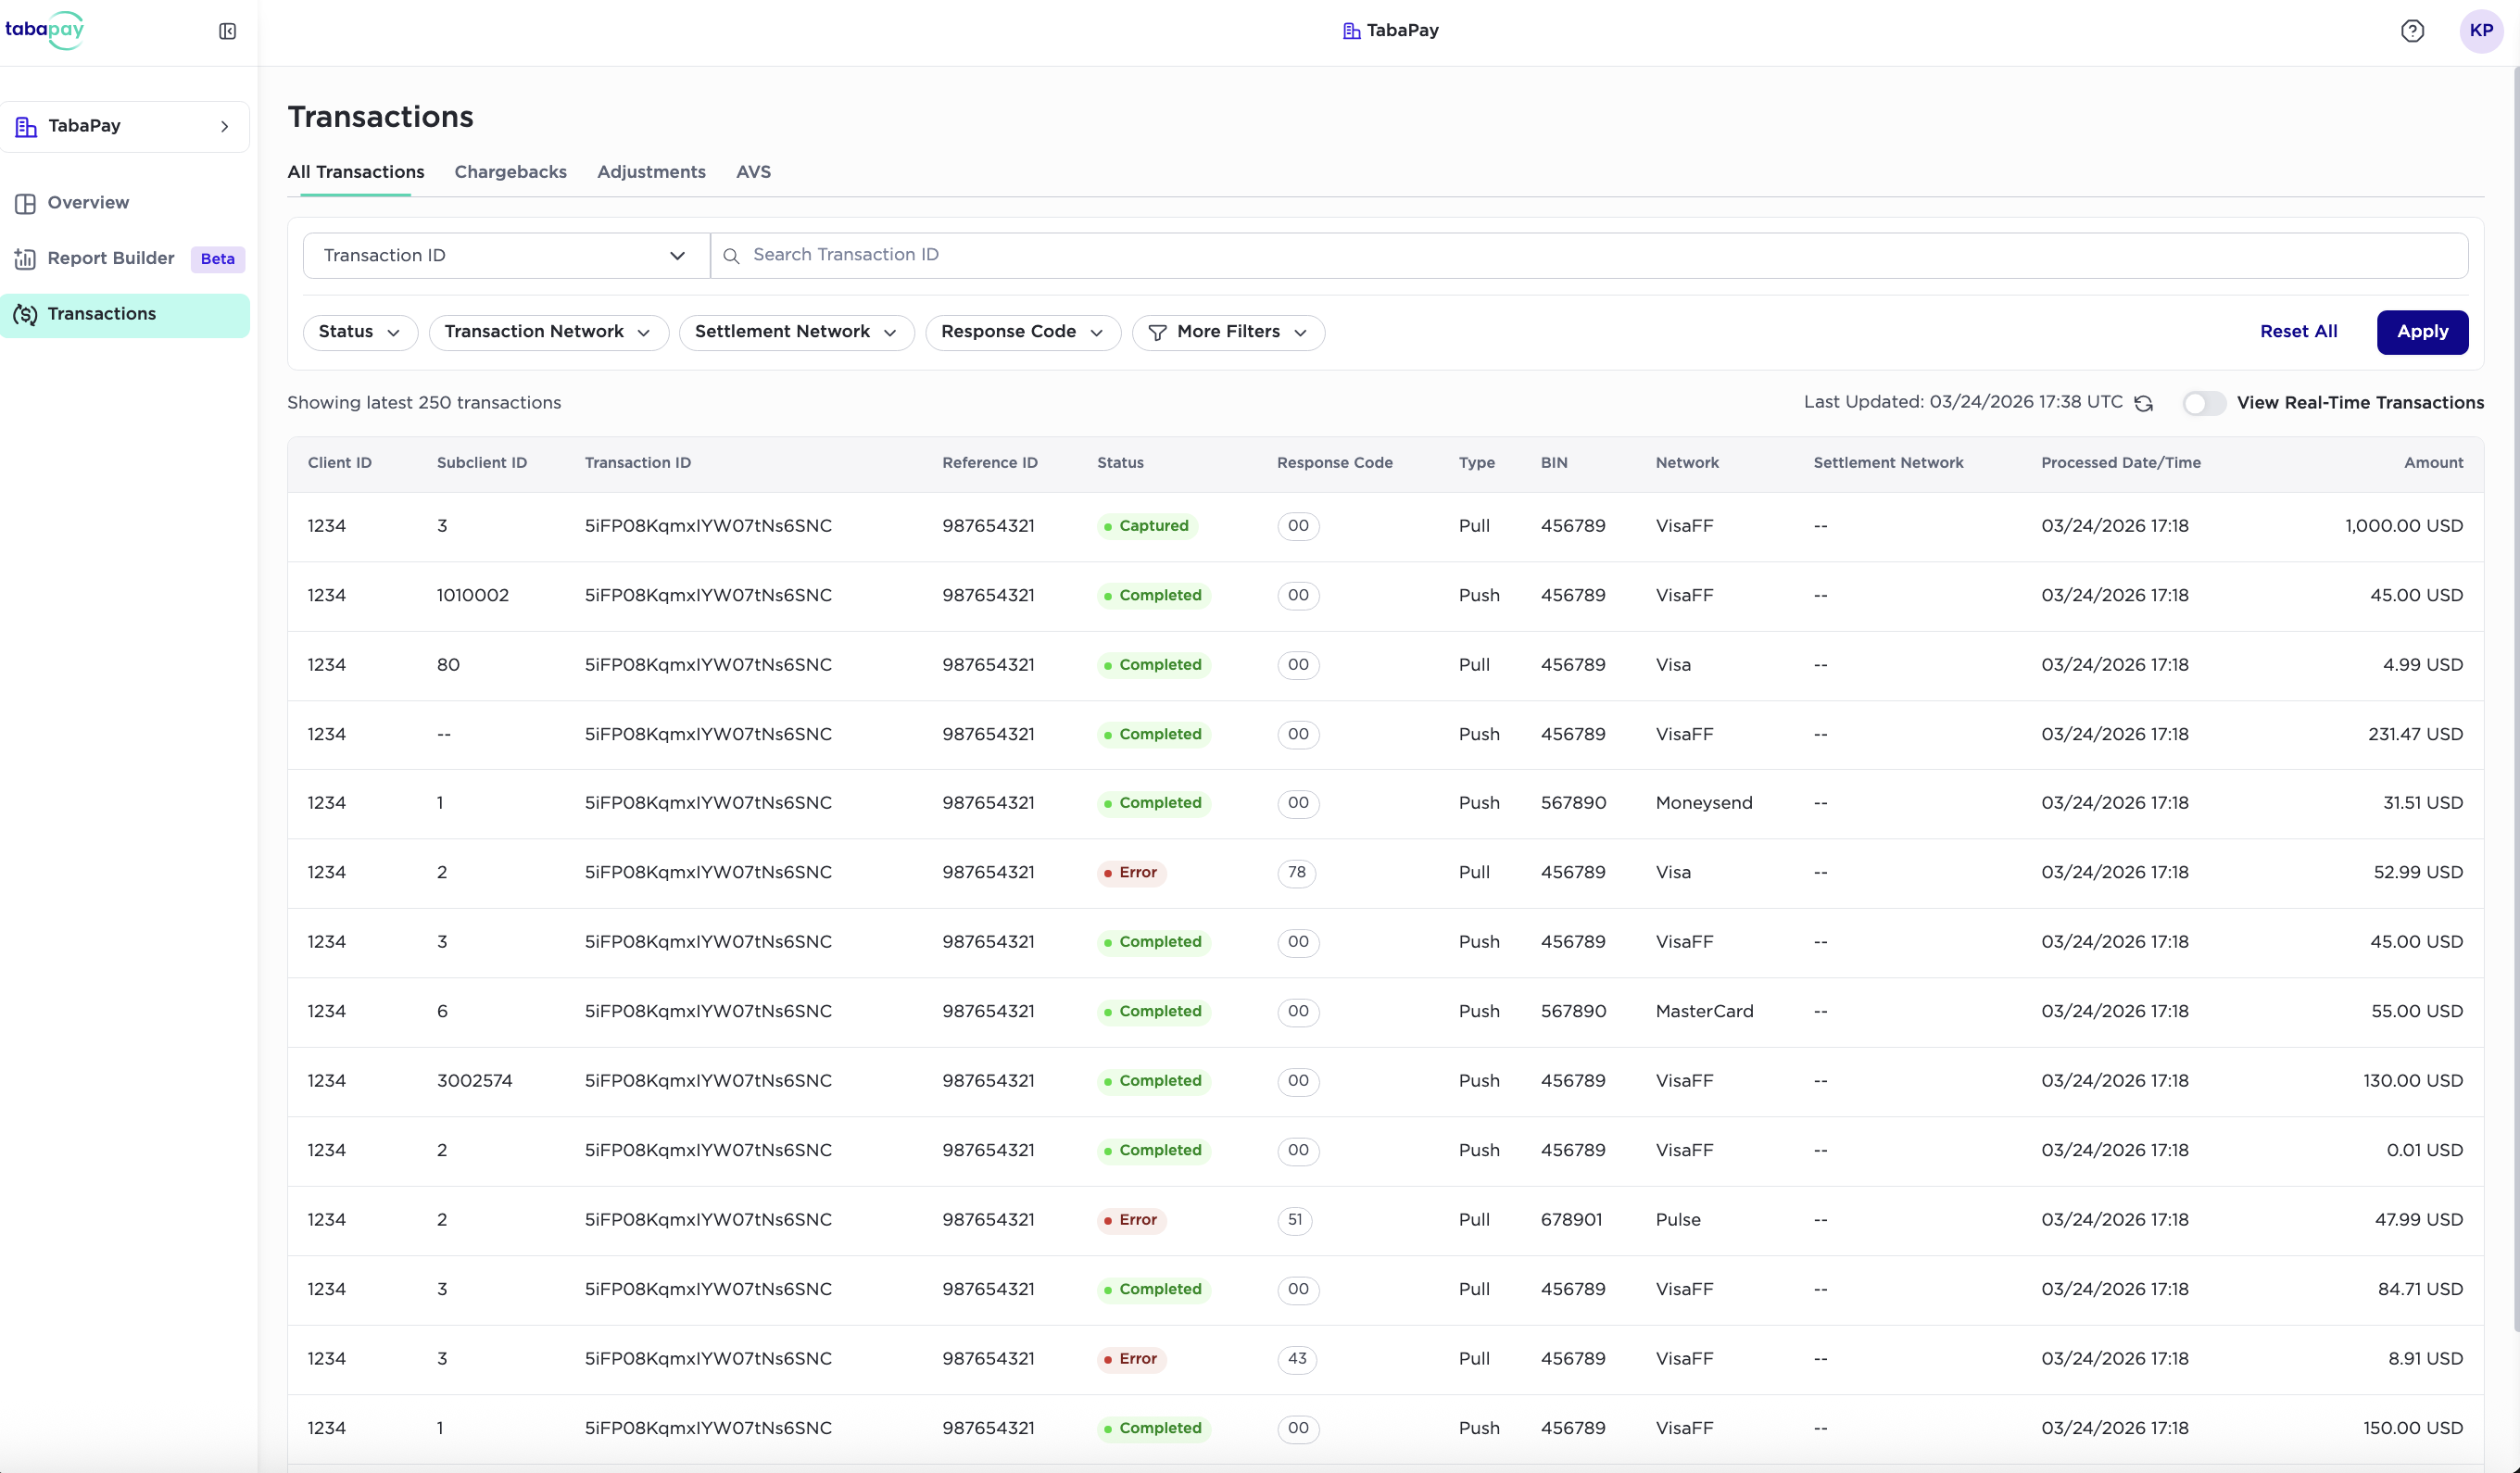
- To disable the View Real-Time Transactions, toggle the switch to view an Enhanced Transactions Feed.
The Enhanced Feed offers additional search and filter options (see below for more details), along with more metadata and a transaction timeline.
- The Enhanced Feed updates every 15 minutes and may take up to 35 minutes during peak hours, while the real-time feed refreshes instantly.
Transaction Table Refresh Rates
-
Transactions: every 15 minutes (it can take up to 35 mins during peak hours)
-
Chargebacks: daily
-
Adjustments: daily
-
Reversals: every 15 minutes (it can take up to 35 mins during peak hours)
-
ACH: dally
-
ACH returns: daily
-
AVS: every 15 minutes
Real-Time Feed

Searching Transactions (Real-Time Feed)
You can search transactions in the search bar by: Transaction ID, Name and Reference ID.
- On the search bar, click the left side of the input field.
A dropdown menu will appear.
- Select one of the categories from the dropdown on the left of the search bar.
-
Transaction ID
A unique 22-character identifier representing a created transaction. Generated by TabaPay and present in the Create Transaction response body.
-
Name
First and Last Name of the cardholder or bank account holder.
-
Reference ID
A unique 1-15 character identifier. Generated by the client and passed into Create Transaction request body.
Note: Currently, the table only shows the most recent 100 transactions.
-
- Input the corresponding information in the search bar.
- Select Search.
Note: To view a guide on selecting specific transactions, see Viewing Transaction Details.
Enhanced Feed
Searching and Filtering Transactions
- On the search bar, click the left side of the input field.
A dropdown menu will appear.
- Select field to search for the transactions by.
-
Transaction ID
A unique 22-character identifier representing a created transaction. Generated by TabaPay and present in the Create Transaction API response body.
-
Name
First and Last Name of the cardholder or bank account holder.
-
Reference ID
A unique 1-15 character identifier. Generated by the client and passed into Create Transaction API request body.
-
Network ID
A unique character set to every authorization and financial request to a specific network.
-
- To filter transactions by Status, Network, or RC, select one categories of the under the search bar.
-
Status
Refers to the Resource Status, or current state of a transaction.
-
Transaction Network
The source or destination network (where the transaction originates from or is sent to) that authorizes a transaction.
-
Settlement Network
The network where the final funds settle.
-
Response Code
-
- To see more filtering options including the following, click on More filters.
-
Transaction type
The classification of the payment being processed.
Values include:- Purchase-Reversal
- Purchase-Void
- Disbursement
- ACH-Credit
- Purchase
- ACH-Debit
-
Transaction amount
Amount value passed in the Create Transaction API
-
Bank Identification Number (BIN)
Unique set of four to eight digits on a payment card.
-
Last 4 Card/Account Number
Last 4 of beneficiary card (if the editor strips leading "0"s, left-pad “0s” to reach length 4).
-
Acquirer Reference Number (ARN)
Used for reconciliation and exceptions tracing
Format: Asterisk (*) followed by 23 characters
Can be null
-
Processed Date
Date/Time (GMT) of the network response confirming that the transaction was processed
-
- Check any desired boxes, or input relevant information in the filtering fields.
- Select Apply.
Chargebacks
The Chargebacks page provides a centralized view of all dispute activity associated with your transactions, allowing you to quickly search, filter, and review chargeback cases. This helps your team identify dispute reasons, monitor case statuses.
Searching & Filtering Chargebacks
- Log in to the TabaPay Portal and select Transactions.
The Transaction Page appears.
- Click on the Chargebacks tab
- On the search bar, click the left side of the input field.
A dropdown menu will appear.
- Select field to search for the transactions by.
-
Original Transaction ID
A unique 22-character identifier representing a created transaction. Generated by TabaPay and present in the Create Transaction response body.
-
Exception ID
Unique reference number generated by TabaPay for each exception.
-
Original Network ID
Unique character set to every authorization and financial request to a specific network.
-
- Under the search bar, there is a filter section where you can search or filter transactions by
-
MID
Identifies a specific program, or client/merchant with TabaPay under the ISO. This correlates to the SubClientID used in the API.
-
Exception Date
When the exception code and type was last updated.
-
Exception Code
Network-specific reason code
-
Exception Type
Category of the exception/adjustment
-
Adjustment - credit
-
Adjustment - debit
-
CHARGEBACK
-
CHARGEBACK REVERSAL
-
REPRESENTMENT
-
Return
-
-
Action Status
Current status of the transaction.
-
Status Date
When the status was last updated.
-
Disputed Amount
Amount disputed by the customer
-
- If you don’t find your desired fields in the filter section, click on “More filters”, to see more options including:
-
Respond By Date
The recommended deadline by which the merchant should respond to the chargeback case
-
ISO
4-Digit ID assigned by TabaPay
-
Network
Network card scheme
-
- Check any desired boxes, or input relevant information in the filtering fields.
- Select Apply.
- For more details, select any one row, and refer to the Viewing Transactions Details guide.
Adjustments
The Adjustments page provides a consolidated view of all manual or system-initiated adjustments associated with your transactions, helping you quickly identify corrections, reconciliations, or updates applied to past transactions.
Searching & Filtering Adjustments
- Log in to the TabaPay Portal and select Transactions.
The Transaction Page appears.
- Click on the Adjustments tab
- On the search bar, click the left side of the input field.
A dropdown menu will appear.
- Select field to search for the transactions by.
-
Original Transaction ID
A unique 22-character identifier representing a created transaction. Generated by TabaPay and present in the Create Transaction response body.
-
Reference ID
A unique 1-15 character identifier. Generated by the client and passed into Create Transaction request body.
-
Exception ID
Unique reference number generated by TabaPay for each exception.
-
- Under the search bar, there is a filter section where you can search or filter transactions by
-
Action Status
Indicates the status of the exception.
-
Status Date
Date of most recent change in Action Status. This is the date of the Exceptions report.
-
Exception Settled Amount
Original transaction amount
-
ISO
4-Digit ID assigned by TabaPay
-
MID
Merchant ID (Identifies a specific program/merchant under the ISO)
-
- To find more filtering options, click More filters to include:
-
Exception Date
Date exception posted. Corresponds with the date of the report.
-
Exception Code
Network-specific reason code.
-
Exception Type
Category of the exception/adjustment
-
Adjustment - credit
-
Adjustment - debit
-
CHARGEBACK
-
CHARGEBACK REVERSAL
-
REPRESENTMENT
-
Return
-
-
Exception Network
Network card scheme
-
- Check any desired boxes, or input relevant information in the filtering fields.
- Select Apply.
- For more details, select any one row, and refer to the Viewing Transactions Details guide.
AVS
The AVS page provides a detailed view of AVS (Address Verification Service) and ANI (Account Name Inquiry), allowing you to quickly search, filter, and analyze AVS records.
Searching & Filtering AVS
- Log in to the TabaPay Portal and select Transactions.
The Transaction Page appears.
- Click on the AVS tab
- On the search bar, click the left side of the input field.
A dropdown menu will appear.
- Select field to search for the transactions by.
-
AVS ID
AVS transaction identifier generated from Query Card API + AVS.
-
Network ID
A unique character set to every authorization and financial request to a specific network.
-
- Under the search bar, there is a filter section where you can search or filter transactions by
-
AVS Response Code
AVS Match Code received at the time of transaction.
-
Created Date
Date/Time (GMT) that TabaPay received the Transaction Request from the client
-
BIN
First 6 numbers of the Payment Card
-
Last 4 Card Number
Last 4 of beneficiary card (if the editor strips leading "0"s, left-pad “0s” to reach length 4)
-
PAR
29-character Payment Account Reference.
Can be null
-
- Check any desired boxes, or input relevant information in the filtering fields.
- Select Apply.
- For more details, select any one row, and refer to the Viewing Transactions Details guide.
More on Transactions
Updated 3 days ago